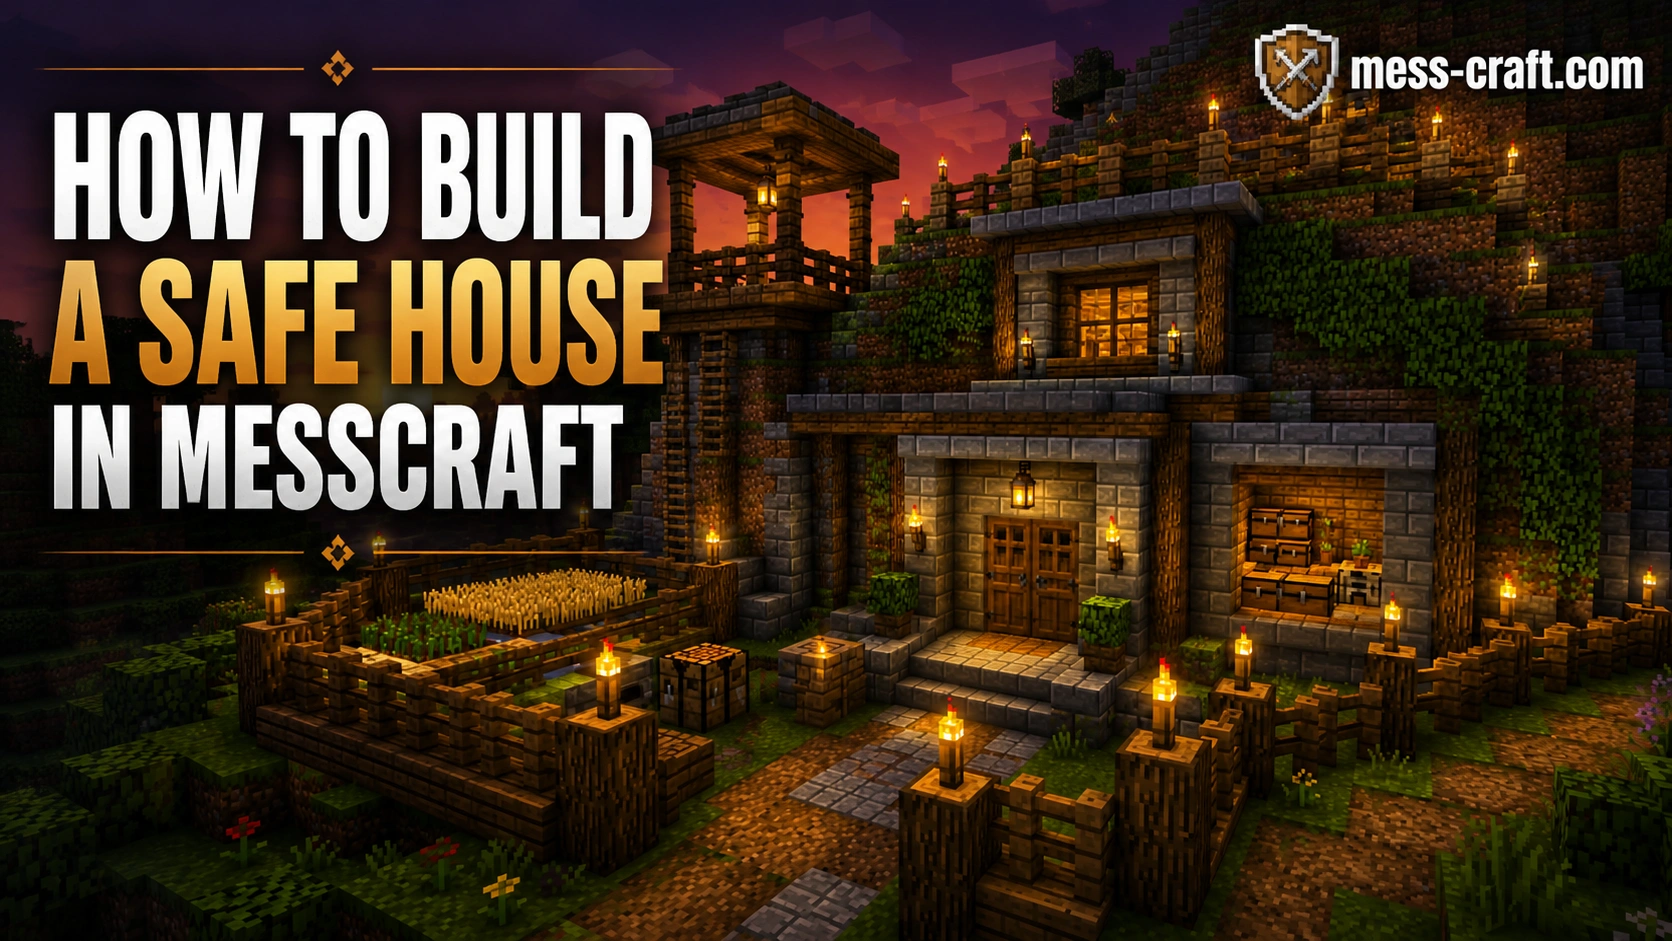
How to Build a Safe House in Messcraft
A safe house in Messcraft is not just a place to sleep. It is your spawn point, storage room, emergency shelter, crafting zone, and first line of defense when mobs or other players become a problem.
MessCraft is commonly described as a browser-based way to play Minecraft-style survival and building gameplay, with versions such as 1.5.2, 1.8.8, and 1.12.2 available on some MessCraft pages. Other game portals describe it as a Minecraft clone where players can mine, craft, build, survive, and play directly in the browser. That means the safest house is not always the biggest one. The best safe house is simple, hidden when needed, easy to defend, and stocked for emergencies.
Here is how to build one properly.
How to Build a Safe House in Messcraft: Start With the Right Location
Your location decides how safe your house will be before you place the first block.
Avoid building in wide-open flat land unless you plan to add walls quickly. Open areas make it easier for mobs and players to spot you. Instead, look for a place with natural protection.
Good safe house locations include:
- A hillside or mountain edge
- A small island
- A forest border
- A cave entrance you can control
- Underground, beneath an ordinary-looking surface
A mountain or hillside base is usually the best beginner option. You only need to defend the front entrance, and the natural stone around you acts like free armor.
If you want a stealthier base, build underground. Just avoid digging straight down. Create a staircase, mark your route, and keep an emergency exit.
Choose Strong, Practical Materials
A safe house should not be made from weak blocks if you can avoid it. Dirt and wood are fine for your first few minutes, but they are not ideal for a long-term base.
Use stronger blocks such as:
- Cobblestone
- Stone bricks
- Deepslate-style blocks if available
- Iron doors for controlled entry
- Glass panes for visibility without leaving gaps
Wood looks nice, but it can be risky if fire or lava is nearby. A smart approach is to use stone for the structure and wood only for decoration, floors, or furniture.
Do not overbuild too early. A compact 7×7 or 9×9 safe house is easier to light, defend, and organize than a huge empty mansion.

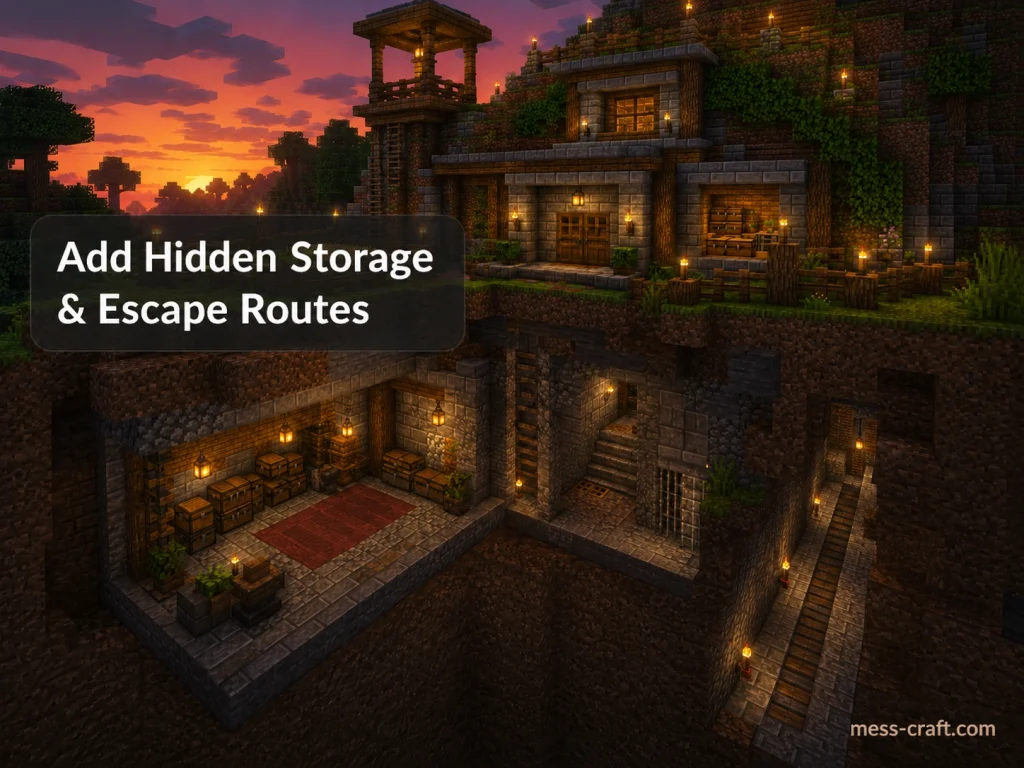
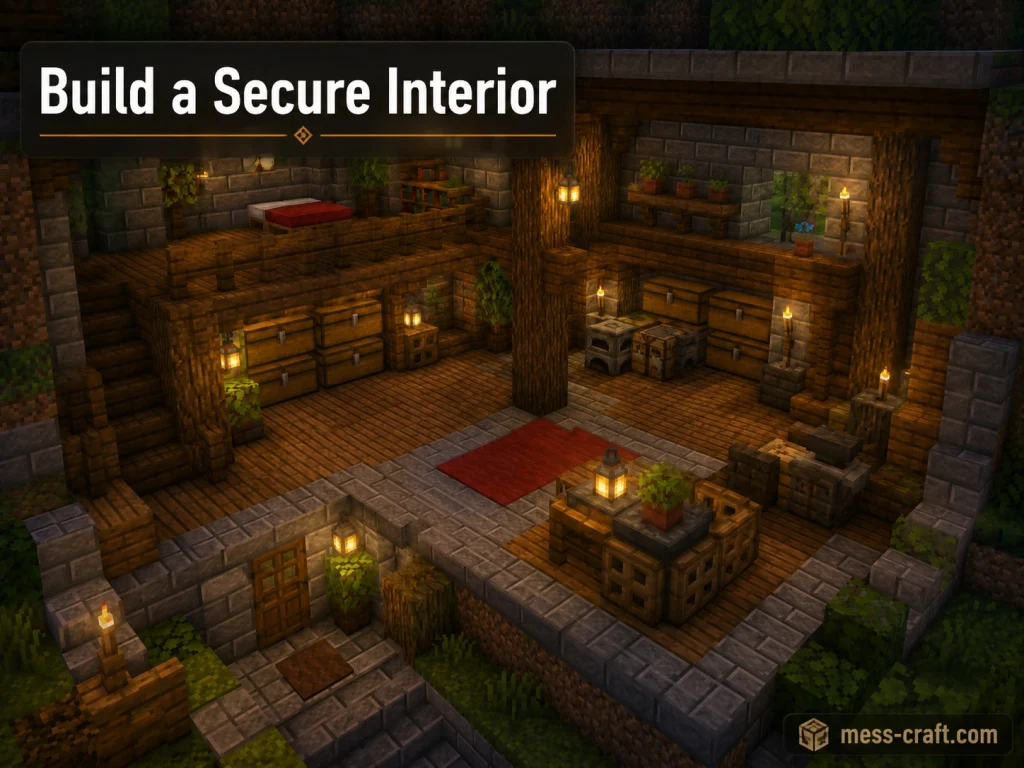
Build a Secure Basic Layout
Start with a simple square or rectangle. Your first safe house should include five zones:
1. Main Room
This is where you place your crafting table, furnace, and basic storage. Keep it clean. If your base is messy, you will waste time during emergencies.
2. Sleeping Area
Place your bed away from the entrance. If possible, put it behind an interior wall so mobs or players cannot reach it immediately.
3. Storage Wall
Use labeled chests if signs are available. Separate tools, food, blocks, weapons, armor, and rare items.
4. Defense Entrance
Never use a plain open doorway. Use a door, fence gate, trapdoor system, or small tunnel entrance.
5. Emergency Exit
Every safe house needs a second way out. A hidden tunnel behind a painting, trapdoor, or lower staircase can save your inventory.
Make the Entrance Hard to Rush
The entrance is the weakest part of most beginner houses.
Instead of placing one door on a flat wall, create a short entry corridor. This gives you control if something follows you inside.
A good entry setup looks like this:
- Outer door
- Two-block hallway
- Inner door
- Torch or light source
- Small side window or viewing gap
For extra safety, place a trapdoor pit or water trench outside the first door. Even a simple one-block drop can slow enemies down.
If you are playing multiplayer, avoid making the front entrance obvious. Hide it behind leaves, a hill curve, a waterfall, or a fake mining tunnel.
Light Up Everything Around the House
Darkness is dangerous. A safe house is only safe if the surrounding area is controlled.
Place lights:
- Around the entrance
- On the roof
- Along nearby paths
- Inside every room
- Around farms and animal pens
- Near your mine entrance
Do not only light the inside. If the outside is dark, mobs can gather near your door. That turns every morning exit into a fight.
A useful rule: stand at your doorway and look in every direction. If you see dark patches near your base, light them.

Add a Wall, Fence, or Natural Barrier
Once your core house is ready, build an outer defense layer.
You do not need a giant castle wall. A simple fence, cobblestone wall, trench, or raised platform works well.
Good beginner defenses include:
- A two-block-high wall
- A fence perimeter
- A water moat
- A cactus line if available
- A narrow bridge entrance
- A watchtower for visibility
The goal is not to make your base look aggressive. The goal is to create distance between danger and your front door.
Build Smart Storage and Survival Supplies
A safe house should help you recover after a bad fight or failed mining trip.
Keep an emergency chest near your bed with:
- Spare sword or axe
- Spare pickaxe
- Food
- Torches
- Basic armor
- Building blocks
- A few valuable but replaceable resources
Do not store everything in one chest near the entrance. If another player finds your house, that is the first place they will check.
For multiplayer safety, hide your best items in a second storage room underground. This is where the phrase “khud say dhond kay lekhna” fits the strategy: do not copy the most obvious base design. Find your own hiding pattern and make it harder to guess.
Upgrade Your Safe House Over Time
Once your base is stable, improve it in layers.
Start with survival essentials. Then add comfort. Then add defense.
Upgrade order:
- Stronger walls
- Better lighting
- Organized storage
- Hidden escape tunnel
- Farm nearby
- Watchtower or lookout point
- Secret valuables room
- Safer mine entrance
This keeps your base useful instead of turning it into a decoration project too early.
Common Mistakes to Avoid
The biggest mistake is building too large too soon. Large houses need more lights, more walls, and more time to defend.
Also avoid:
- Placing your bed next to the entrance
- Leaving the roof dark
- Using only wood near lava or fire
- Keeping all valuables in one obvious chest
- Building beside deep caves without sealing them
- Forgetting an emergency exit
- Making your base too visible in multiplayer
A good safe house is boring to attack and easy to live in. That is the balance you want.
Conclusion
Building a safe house in Messcraft is about smart survival, not expensive design. Pick a protected location, use strong blocks, secure the entrance, light the area, organize your supplies, and create a backup escape route.
Once your house protects your bed, storage, tools, and movement, you can expand it into a fortress, bunker, mountain base, or hidden underground home.
FAQ
What is the best place to build a safe house in Messcraft?
A hillside or mountain is the best beginner location because it gives natural protection and limits the number of sides you need to defend.
Should I build above ground or underground?
Above ground is easier for beginners. Underground is safer for stealth, especially in multiplayer, but you need clear paths, lighting, and an escape tunnel.
What blocks are best for a safe house?
Cobblestone, stone, and stone bricks are better than dirt or plain wood. They are stronger, easier to gather, and more reliable for survival bases.
How big should my first safe house be?
A 7×7 or 9×9 base is enough for a bed, crafting table, furnace, and storage. Keep it compact until you have more resources.
How do I protect my safe house from mobs?
Use lighting, walls, doors, fences, and controlled entrances. Most mob problems start because the area around the house is too dark.
Do I need traps for a safe house?
Not at first. A secure door, lit perimeter, and outer wall are more important. Add traps later once your basic survival setup is stable.